Last updated on August 5, 2024
About a year ago I purchased a null modem (serial) cable to let me connect my Apple IIe Card enabled LC 475 to my Apple IIc, and decided I should also test it out as a way to transfer files between my Windows 10 PC (should also work with OSX and Linux) and my Macintosh Plus, it was actually fairly easy. One of the methods I tried, and the one I use the most, is transferring small files from Basilisk II to my 68k Macintosh. For larger files I use Basilisk II to edit my drive images.
You may also be interested in my posts about using Apple Remote Access (ARA 1.0 or ARA 2.1) so you can exchange files via shared folders, or even surf the web using using Basilisk II on your modern system as a gateway.
Speed
This guide describes how to use Zterm with a null modem connection, instead of using a real modem, to connect Basilisk II to real Macintosh and use X/Y/ZModem as the communication protocol over that link. From what I’ve read on Low End Mac and MacWorld (April 1996 page 47), the connection speed limits for this method are likely:
- 19.2 kbit/s (2.4KB/s) on 68000 Macintosh Systems
- 57.6 kbit/s (7.2KB/s) on all other pre-PPC Macs except IIfx and Centris/Quadra AV that have IOP ports
- 900 kbit/s (112.5KB/s) for the IIfx, Quadra 900, and Quadra 950 thanks to there Input/output processor (IOP) ports
- 2Mbps (256KB/s) for Centris/Quadra AV systems with Direct Memory Access (DMA) serial ports (GeoPorts)
According to Window’s Device Manager the max speed for my USB to serial adapter is 921.6kbit/s (115.2KB/s), about the same as the Macintosh IOP ports, but Zterm 1.01 has a max data rate of 230.4kbit/s (28.8KB/s). If anyone has a IIfx or Centris/Quadra I’d be curious to find out if you can hit the 230.4kbit/s as a transfer rate.
What you need
- A modern system capable running Basilisk II and a 68k Macintosh running System 3.x or higher with 512k of ram or greater
- A USB/Serial null modem cable, you can make one, or simply buy the null modem cable and a USB to Serial Adapter
- Basilisk II setup for a serial port connection running booting from one of my System 7.5.5 drive or partition images
- ZTerm 1.0.1 by David Alverson running both in Basilisk II and on your 68k Macintosh. ZTerm 1.0.1 is included on my System 7.5.5 drive and partition images in the network folder
1.0 Macintosh and Windows 10 PC
I don’t have a modern Macintosh, so I can only describe how to a modern Windows 10 PC with Basilisk II connect to a 68k Macintosh via a USB to Serial connection. This isn’t a TCP IP connection, e.g. you can’t connect to the internet through this, but you can use this method to copy files to and from your Modern System running Basilisk II and your 68k Macintosh.
2.0 Getting the right cables ~ $45 USD
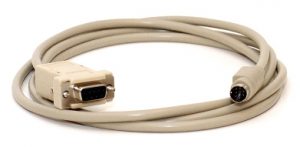
I took the easy route and bought both the RS-422 mini-din-8 Male (Macintosh Plus or later) to RS-232 DE-9 Female (PC) cable and USB to RS-232 from RetroFloppy. The cable is listed as a Apple IIgs, IIc+, LC III null modem (Figure 1).
If you want to make your own cables Mac GUI provides a guide for both the RS-422 mini-din-8 Male and RS-422 DE-9 Male (128k and 512k) to RS-232 DE-9 Female cable as part of his description for making various null-modem cables for his Macintosh 512.
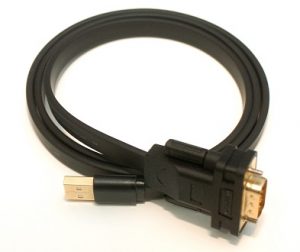
Since most modern computers do not have serial port connections you’ll likely need a USB to Serial adapter cable. I bought my USB to RS-232 Adapter from RetroFloppy (Figure 2) at the same time I bought the Apple IIgs, IIc+, LC III null modem (Figure 1). I didn’t want to have to trouble shoot an issue with some other brand, and at least RetroFloppy had tested what they were selling.

3.0 Setting up the Serial Connection on Basilisk II
- Connect your RS-232 DE-9 Male (PC) to Usb cable (USB to Serial adapter cable) to your RS-422 mini-din-8 Male (Mac) to RS-232 DE-9 Female (PC) serial cable
- Connect the cable between your modern system and your 68k Macintosh
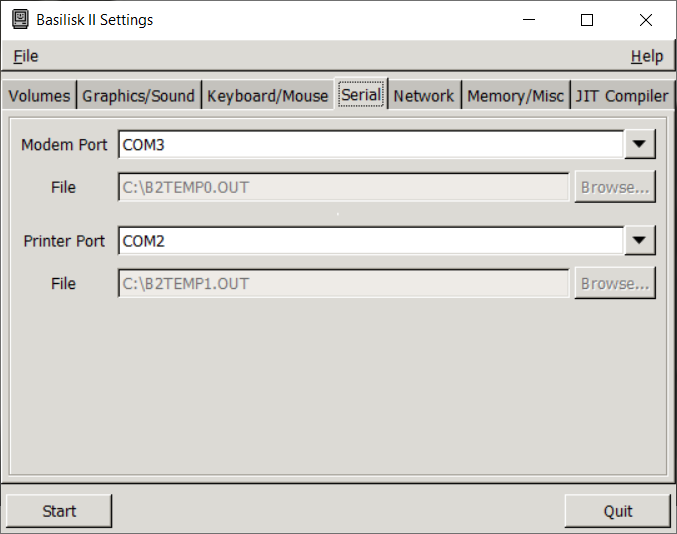
- Your modern system should assign a serial port name to that new connection, for my Windows 10 System it was assigned COM3 (Figure 3)
- Run
BasiliskIIGUI.exeand on the Serial Tab point the Modem Port to the serial port name, e.g. COM1, COM2, or for me COM3. If you haven’t setup Basilisk II before, I’ve created a separate blog entry that summarizes how to set up Basilisk II and boot the emulator using my drive images. While configuring Basilisk II, under Step 4 of that guide, also set the Modem Port (Figure 4).
4.0 ZTerm by David Alverson
For this guide I’m using a program call ZTerm on both my 68k Macintosh System and under Basilisk II. I chose ZTerm for several reasons:
- ZTerm works under both System 6.0.8 and System 7.5.5
- ZTerm supports the Zmodem protocol allowing me to send multiple files in a single transfer
- ZTerm auto initiates receive on send, so I only have to have ZTerm open on the receiving system and it will automatically accept transfers
- The 1.0.1 version doesn’t seem to be crippled in anyway, which is good because the registration feature on David’s site doesn’t work anymore :-(, I’d gladly send him the $30 to register as a thank you for creating this program.
4.1 Configuring ZTerm
You can find ZTerm 1.0.1 on my drive and partition images in the network folder, or you can download it directly from the author’s site, note I had some issues with the version on the author’s site, it seemed to be compressed with an newer version of StuffIt than I typically use. If you are using one of my drive or partition images I’ve saved the settings described in this section as ModernTo68k.
Complete the following steps on both Basilisk II and your 68k Macintosh:
- Load ZTerm, if you are using my image with ZTerm the profile
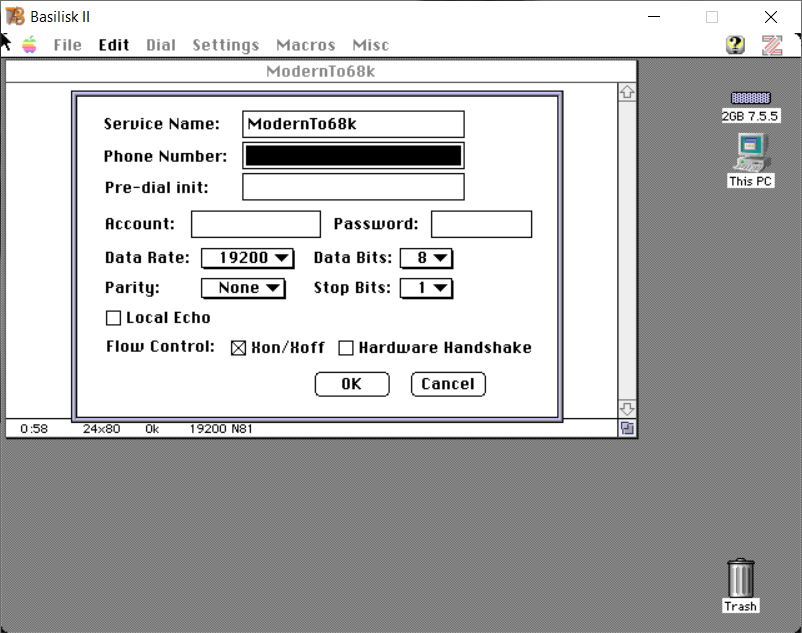
ModernTo68kwill load by default, otherwise the last open profile will load. - Settings -> Connection (Figure 5), update the Data Rate to the maximum that your 68k Macintosh can support, typically 68000 = 19200, 68020 = 38400, 68030 = 57600, but feel free to experiment, there are a lot of factors that come in to play, I’ll describe in 4.2.5 how you know if you connection speed has been set to be faster than your 68k system can handle.
- Settings -> Transfer Options (Figure 6), set both send and receive to ZModem, you should be able to leave everything else the same.
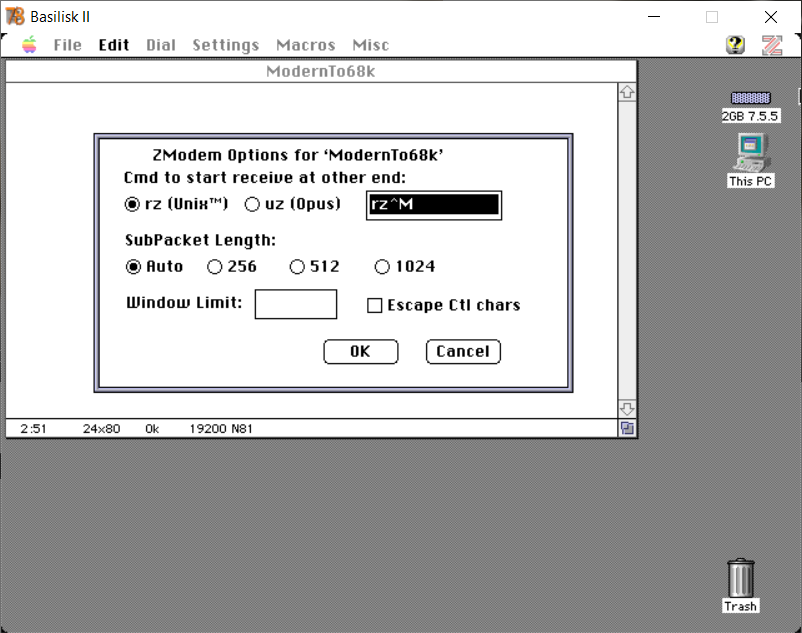
- Settings -> ZModem Options (Figure 7), set the Cmd to start receive to rz (Unix), I find this has the best support for working with other software
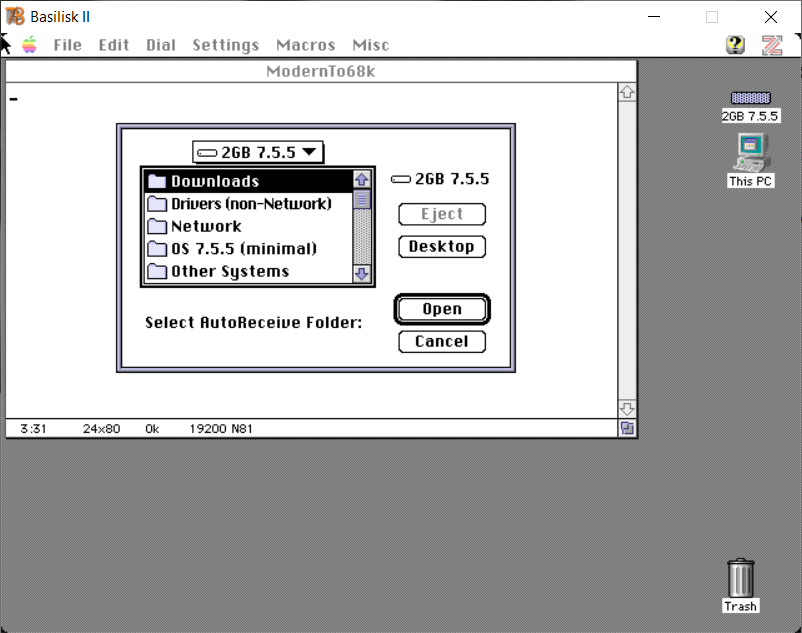
- Settings -> Receive Folder (Figure 8), specify what folder you want received files to be stored in, if you are using my image the default in the Downloads folder
- Settings -> Dial -> Save Setup
4.2 Using ZTerm
- Open ZTerm on both your 68k Macintosh and in Basilisk II, select one to be the Sender
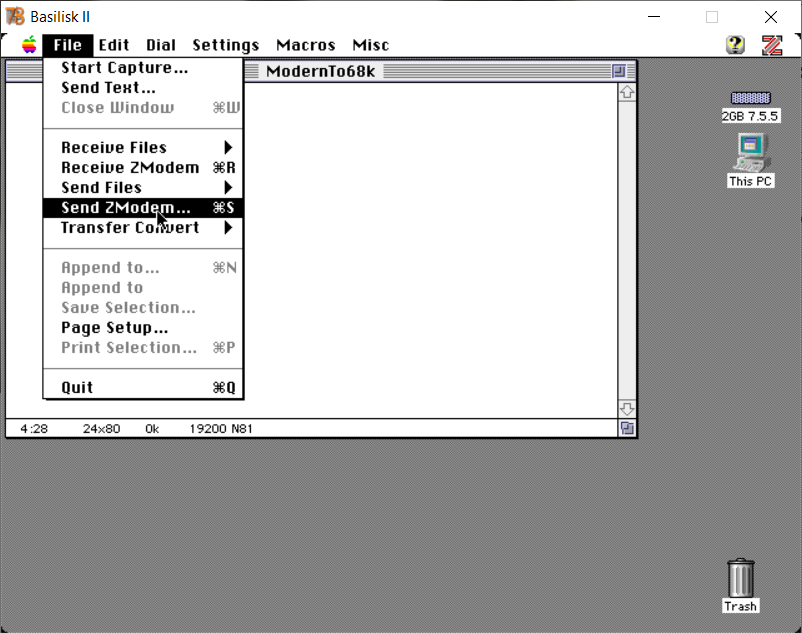
- On the Sender go to File -> Send ZModem (Figure 9)
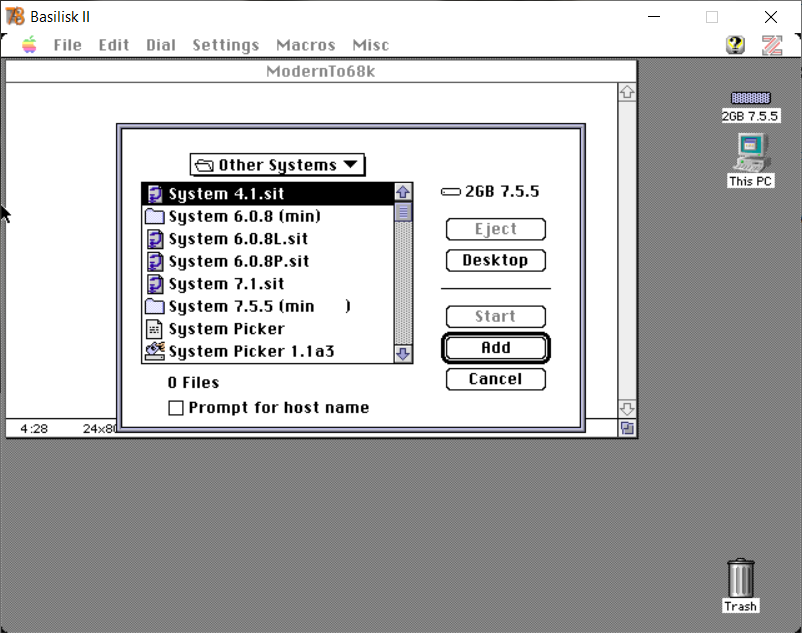
- Select the files you want to send using the Add button (Figure 10)
- Press the Start button
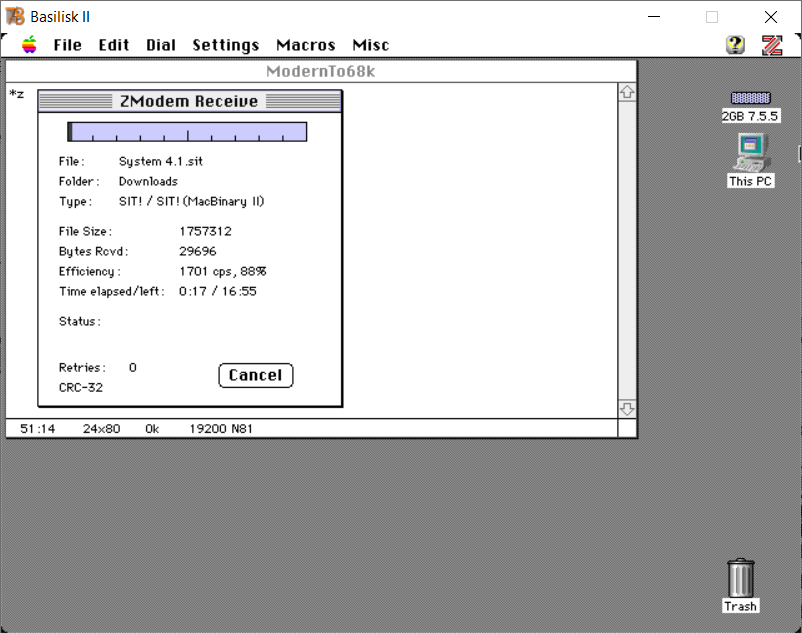
- The Receiver should automatically detect that a file is being sent and start receiving (Figure 11), if the speed was set too fast in step 4.1.2 above (figure 5) you’ll notice that the Efficacy rating seen in Figure 11 is low. I’m using a FloppyEMU with my SE for this guide and the Floppy IO is likely negatively impacting the speed.
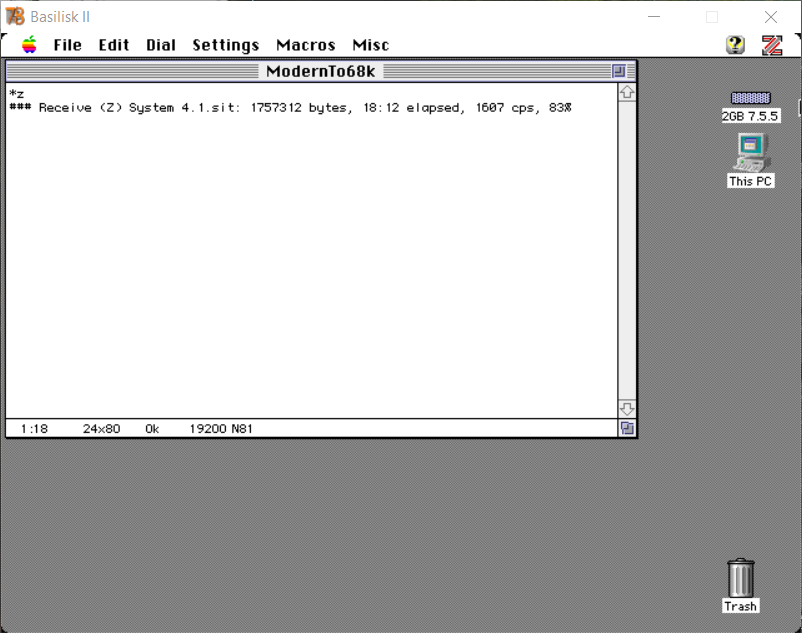
- Figure 12 shows the message when the file transfer is done.
Using the same approach with a null modem cable and USB to serial adapter, I have managed to transfer files directly from Ubuntu linux with minicom and Zterm on the Mac side (No need to use Basilisk II with this approach). The settings in Zterm are as above, and the settings in minicom need to match these.