Last updated on February 22, 2024
One of the most popular features of my site is my ready made System 6.0.8 or System 7.5.5 bootable images for use with 68k Macintosh systems. This entry describes how you can edit my volume images on Windows 10 using Mini vMac (Mini vMac cannot read or modify drive images). You probably know what Mini vMac is, but if not, a quick summary: Mini vMac is an open source emulator of some 68k-based Macintosh computers that runs on Windows, OS X, Linux, FreeBSD, NetBSD, Open Indiana, Microsoft Windows Mobile, and some other platforms. I mainly use Mini vMac for working with System 6.x and earlier Systems that aren’t supported by Basilisk II. Once I have everything setup the way I want on the volume image I can use Basilisk II to copy the contents of the volume image to a drive image if needed.
Because Mini VMac is already well documented on sites like Emaculation, I’m only going to describe the basics of how to setup Mini vMac and focus on how you can use it to add or remove files from the System 6.0.8 or System 7.5.5 bootable volume images available to download on my site.
Quick Start
- Download and install Mini vMac (this guide was written using version 36.04)
- Create or download the matching ROM file from the internet archive for the version of Mini vMac you downloaded: 128, 512Ke (same ROM as the Plus), Plus, SE, SE FDHD, Classic, or II (can also use IIx, IIcx, II FDHD, SE/30)
- Download my 2GB System 7.5.5 volume image
- Run Mini vMac
- Drag and drop the correct ROM file on to Mini vMac (you can also rename the ROM file and store it in your Mini vMac folder to skip this step in the future.
- Drag and drop my 2GB System 7.5.5 volume image on to Mini vMac to boot from that image file
- Drag and drop any other volume images on to Mini vMac that you want to edit.
- Copy files from your host system on to a partition image using Mini vMac
- Copy files from a volume image on to a drive image
1. Download and install Mini vMac
The latest version for Windows, OS X, Linux etc. can be found on the www.gryphel.com.
- Download the latest build from www.gryphel.com for this example I’m using version 36.04 for Windows
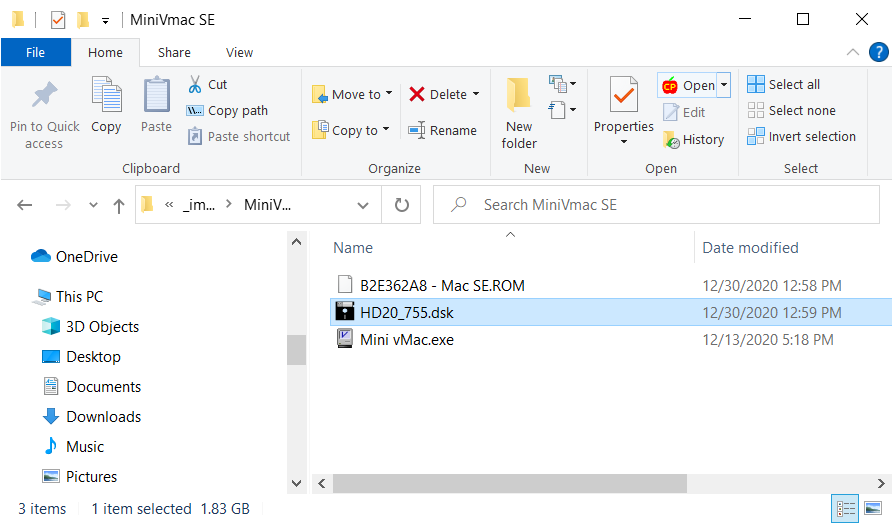
- Create a destination folder on your system that you will install Mini vMac in. E.g.
Mini vMac 36.04 - Unzip the contents of the latest build to your destination folder
- Mini vMac is now installed, and ready to run.
2. Download and select a ROM file
To run Mini vMac you’ll need a file containing a copy of the ROM for the system you are trying to emulate, e.g. if you downloaded the Plus variation of Mini vMac, you’ll need the a copy of the Plus’s ROM. Luckily these ROM files are now available on the internet archive and can be used for personal/research purposes: 128, 512Ke (same ROM as the Plus), Plus, SE, SE FDHD, Classic, or II (can also use IIx, IIcx, II FDHD, SE/30)
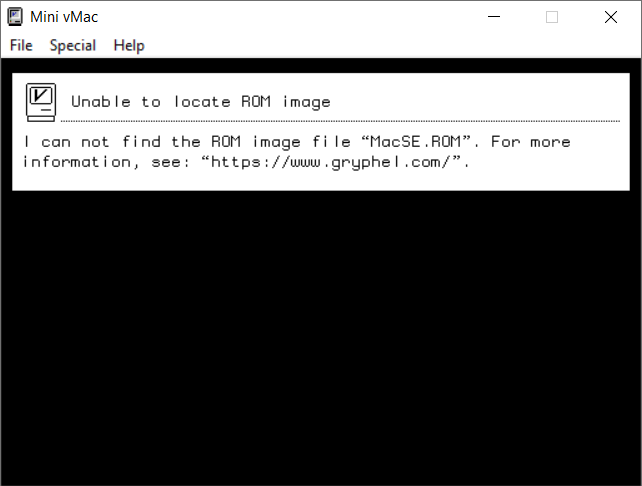
Download or create a copy of your own ROM, then place that ROM file in the folder you created in section 1.2 above. For the Plus you can rename the file to vMac.ROM, for the SE it was MacSE.ROM. Don’t worry if Mini vMac can’t find the ROM file it will give you the name it is looking for so you can rename your ROM file to match. You can also just drag and drop the ROM file on to Mini vMac each time you run it.
3. Selecting an drive or volume image file
Mini vMac can only use partition files, so you can either create one, or download one of my System 6.0.8 or System 7.5.5 volume images.
4. Run Mini vMac
Running Mini vMac is fairly straight forward:
- Run the Mini vMac.exe file (Figure 1)
- Drag and drop the ROM file on to Mini vMac (Figure 2), or rename the ROM file to the name Mini vMac is looking for, e.g. MacSE.ROM
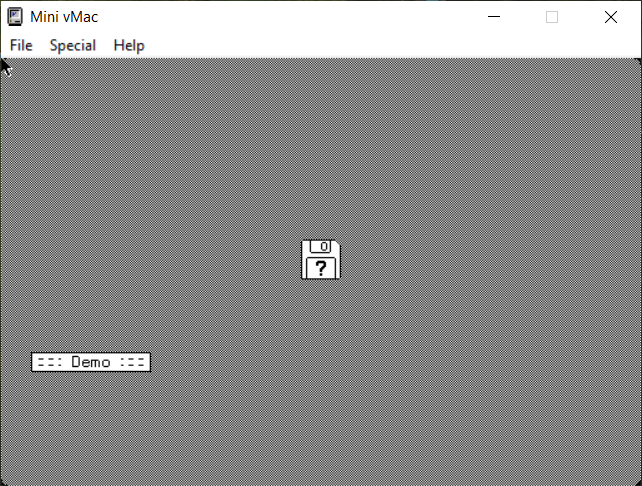
- Drag and drop the bootable volume image HD20_755.dsk or HD20_608.dsk on to Mini vMac (Figure 3), or use Mini vMac -> File -> Open Disk Image. Mini vMac will NOT work with drive images.
- Optional: drag and drop any other volume images or disk images you want to edit on to Mini vMac. Mini vMac does not recognize CDROM images or drive images.
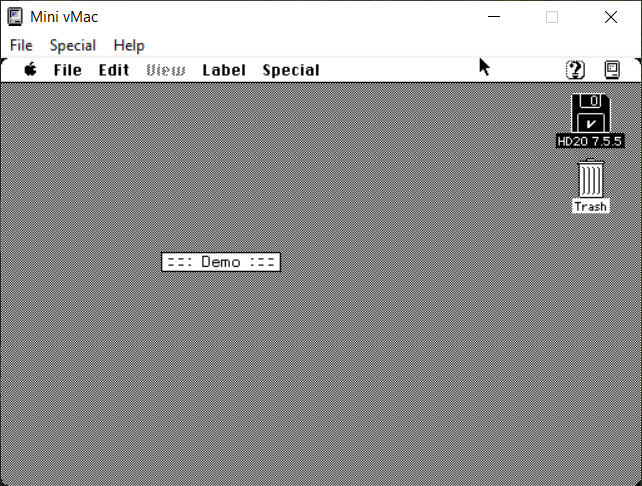
- You’re up and running (Figure 4)
5. Using Mini vMac to edit volume images
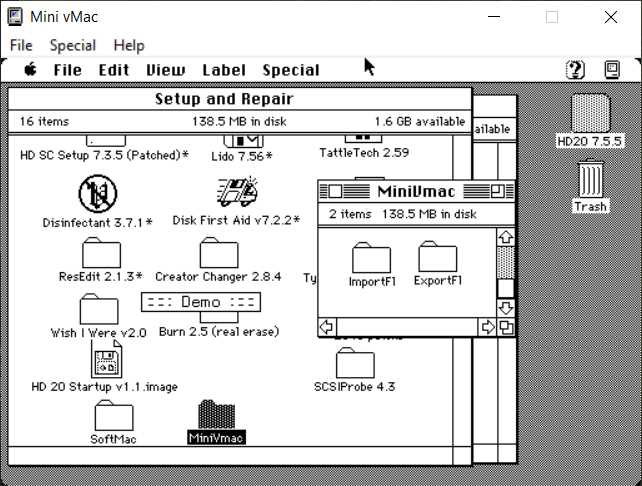
The authors of Mini vMac have also provided some utilities (ImportFL and ExportFL) that you can run within Mini vMac that let you copy files between your emulated Macintosh System in Mini vMac and your host Windows, OSX, Linux etc. system. I also include these utilities (ImportFL 1.2.2 and ExportFL 1.3.1) on my image files under Setup and Repair -> Mini vMac (figure 5 below)
5.1 Using ImportFL
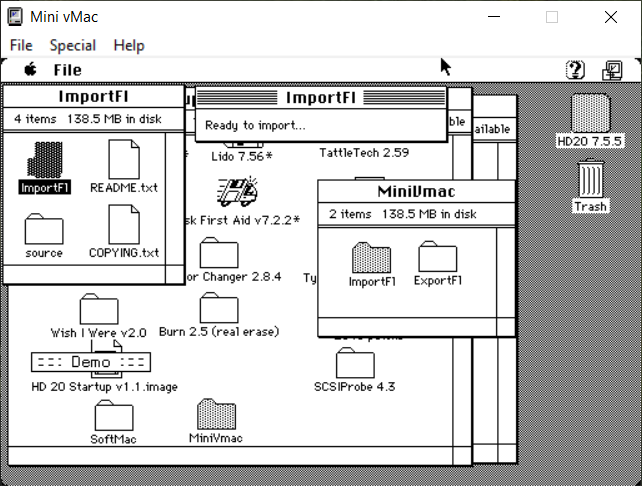
- Run ImportFL (Figure 6)
- Drag and drop the file you want to import on to your Mini vMac windows
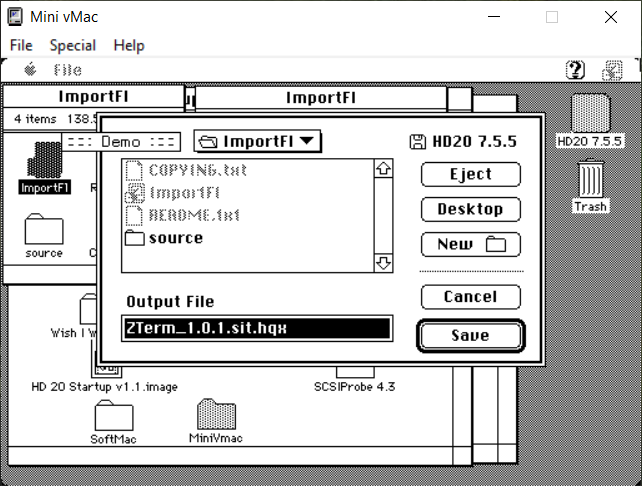
- ImportFL will prompt you for where you want to save to on your emulated Macintosh, by default the folder that ImportFL is in. (Figure 7)
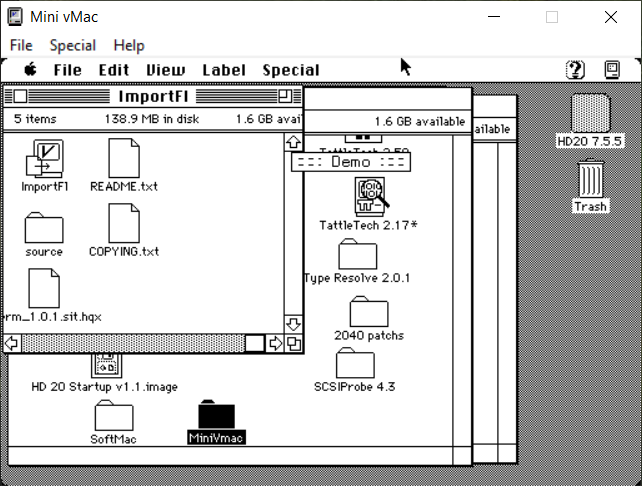
- The file is imported (Figure 8)
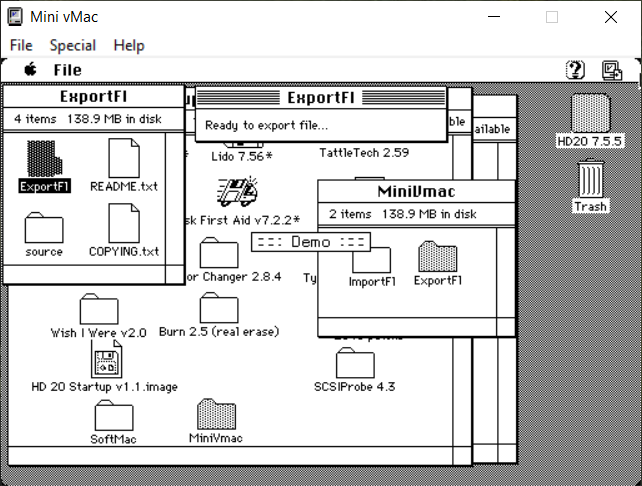
5.2 Export using ExportFL
- Run ExportFL (Figure 9)
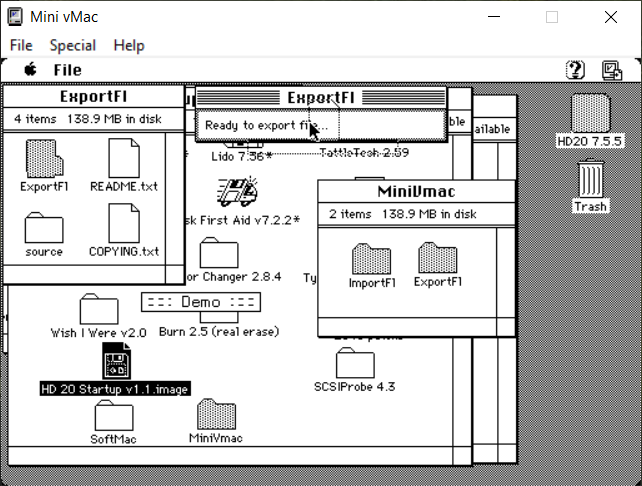
- Drag and drop the file you want to export on to the ExportFl window (Figure 10)
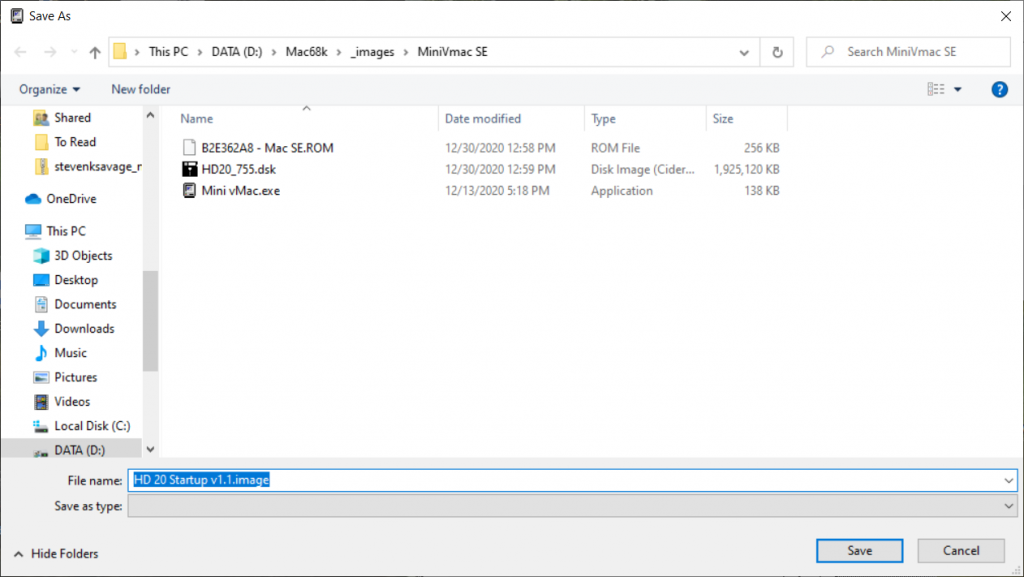
- ExportFL will prompt you for where you want to save to on host system, by default the folder that Mini vMac is in. (Figure 11)
- The file is exported
6. Converting a volume image to a drive image
Unfortunately Mini vMac doesn’t support drive images, so once you’re done setting up and installing everything you want I can mount the volume image on Basilisk II and the drive image I want to copy to, then copy the folders/files from the volume image to the drive image, or use DD to merge the partition image in to a drive image.