Last updated on February 9, 2023
About a year ago I purchased a null modem (serial) cable to let me connect my Apple IIe Card enabled LC 475 to my Apple IIc, and decided I should also test it out as a way to transfer files between my Windows 10 PC (should also work with OSX and Linux) and my Macintosh Plus, it was actually fairly easy. Initially I used it with Zterm, but after a bit of experimentation I got it working with Apple Remote Access Personal Server 2.1 (ARA PS) and can now use Basilisk II to access files using AppleShare and see all the shared devices on my LocalTalk (AppleTalk) network. The speed is still fairly slow, so for larger files I use Basilisk II to edit my drive/volume images, or connect using my Asante SCSI to ethernet adaptor.
What you need
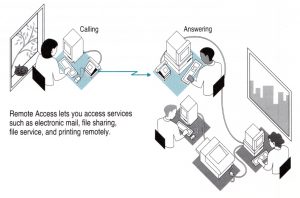
Note: this process will create the equivalent of a “dial-up” connection, see my Zterm entry for more information on what to expect for speed.
- A 68k Macintosh System with at least 2MB of memory running System 7.0 or System 7.1.3
- A USB/Serial null modem cable, I provide links to where I bought mine as part of my entry on using Zterm (I strongly suggest you test your cable using Zterm before trying to setup ARA 1.0)
- The installation files for ARA 1.0, these can be found on my bootable 7.5.5 volume image (in the network folder), or as a disk image, you should also decide which version of ARA you want to use:
- ARA 1.0 (1991): AppleTalk Remote Access, works on all 68k systems that can run System 7.0 with 2MB of memory. ARA 1.0 clients can connect to ARA 1.0 and ARA 2.1 servers, but can not connect to 3.0.2 servers
- ARA 2.1 (1993): Apple Remote Access, works on all 68k systems that can run System 7.1 or later with 4MB of memory (although I was able to run it with 7.1 in 2MB), but System 7.5.3 or later recommended. ARA 2.1 clients can connect to ARA 1.0, 2.1 and ARA 3.0.2 servers.
- ARA 3.0.2: Apple Remote Access, requires 68030+ or PowerPC running 7.1 or later with Open Transport 1.1.1 or later, 7.5.3 or later recommended. ARA 2.1 and 3.0.2 clients can connect to 3.0.2 servers using AppleTalk, 3.0.2 servers also support PPP connections.
- Basilisk II, running a full version of System 7.5.5 with ARA 2.1 installed. Note: I use a LCIII rom with Basilisk II, and I suggest you do the same for this guide, I had issues with getting ARA to work when I tried the Mac IIci rom.
Quick Start
For this Guide I’m going to run ARA 2.1 on Basilisk II under System 7.5.5 as my ARA server, and I also use Basilisk II to create a volume image with System 7.0.1, to use ARA 1.0 with my MacSD on my SE.
- Setup and run Basilisk II with at least 3 volumes: your System 7.5.5 bootable image with ARA 2.1 installed, my System 7.5.5 volume image (or just the ARA 1.0 disk image), and optionally your drive or volume image with System 7.0 or System 7.1.3 to use with your 68k Macintosh.
- Install ARA 1.0 on your System 7.0.1 or System 7.1.3 image file (make sure that you have the file sharing extension installed)
- Enable AppleShare on your 68k Macintosh (should be already enabled in Basilisk as part of setting up ARA 2.1)
- Connecting
- Mount one or more shared folders and/or programs
1. Setting up Basilisk II to do the installs
For this guide I’m going to use Basilisk II to edit my images, my Macintosh downloads page lists other tools that can be used to edit my images if you don’t want to use Basilisk II. I use Basilisk II because it can edit both my drive and volume/partition images, and is my general “go to” emulator, and for this specific case because it supports the serial connections I need for running ARA.
- Run BasiliskIIGUI
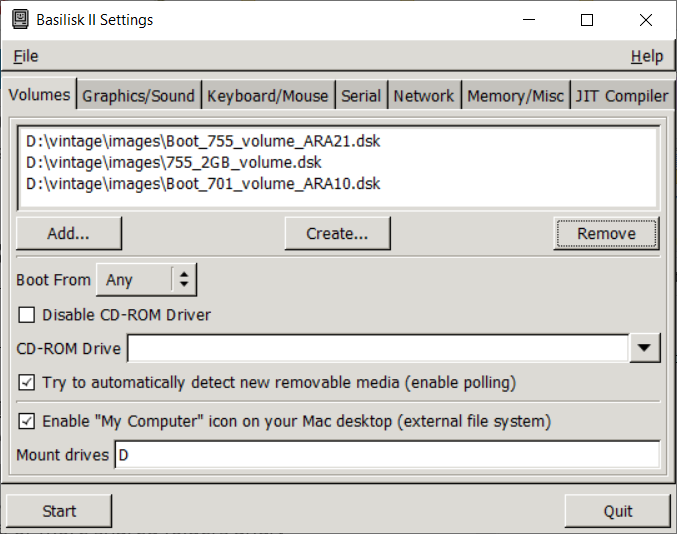
- On the volumes tab (Figure 1):
- add the System 7.5.5 bootable image with ARA 2.1 installed
- add my System 7.5.5 volume image or use the ARA 1.0 disk image
- add your System 7.0.1 and/or System 7.1.3 image file that you plan to install ARA 1.0 on to.
- enable “My Computer” icon on your Mac desktop (bottom left of Figure 1)
- Update any other settings you want to change
- Exit BasiliskII GUI
- Load Basilisk II (Figure 2)


2. Install ARA 1.0
The following steps describe how I installed ARA 1.0 from my my bootable 7.5.5 volume image on to a volume image with System 7.0.1, to use with my MacSD on my SE.
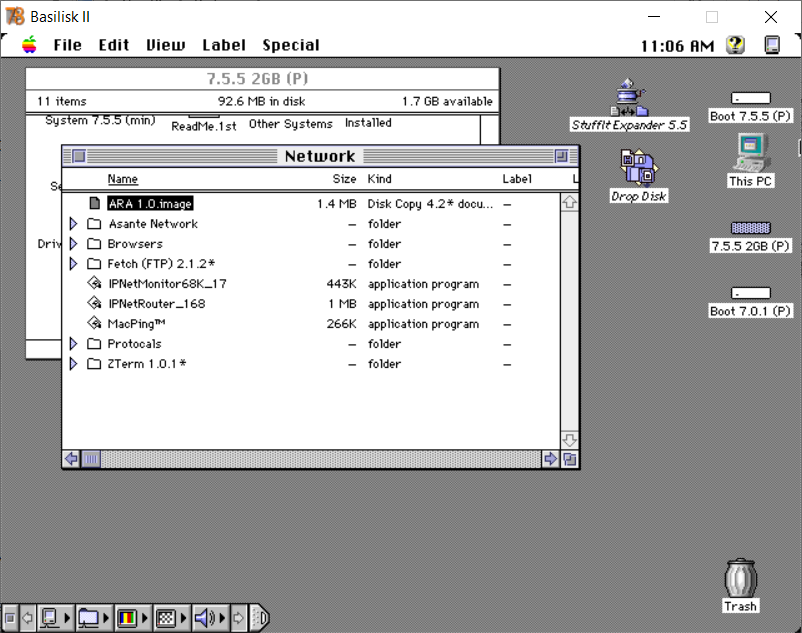
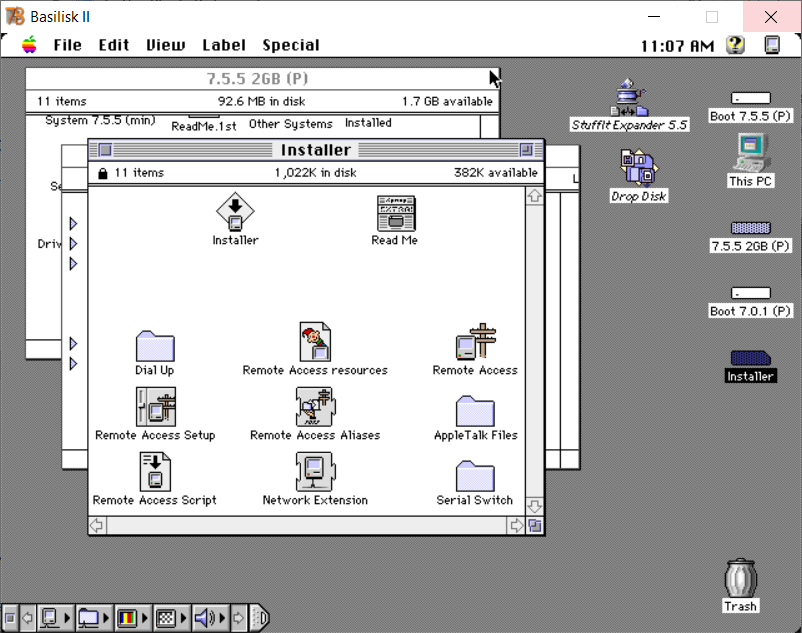
- Open the my bootable 7.5.5 volume image (figure 3)
- Open the Network folder (figure 3)
- Select the ARA 1.0 disk image (figure 3)
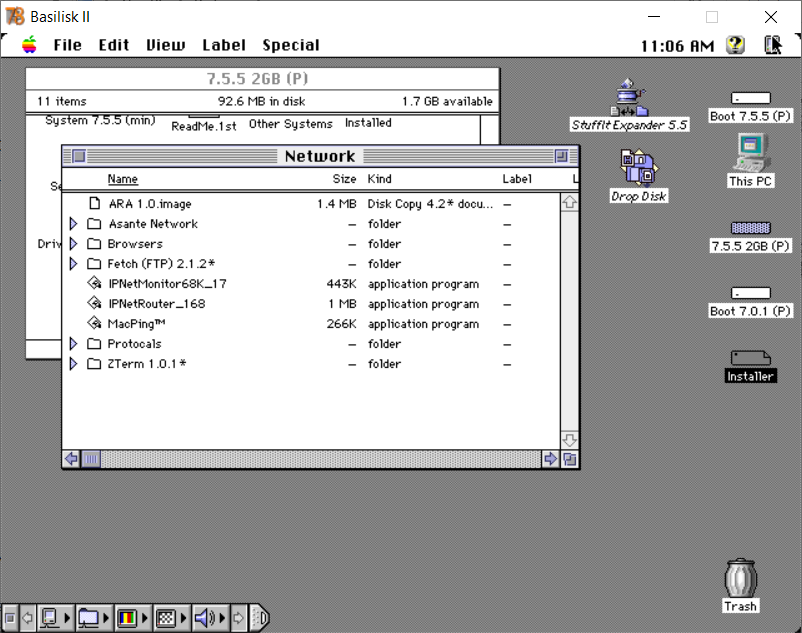
- Drag and drop the ARA 1.0 disk image on to Drop Disk to mount the image (figure 4)
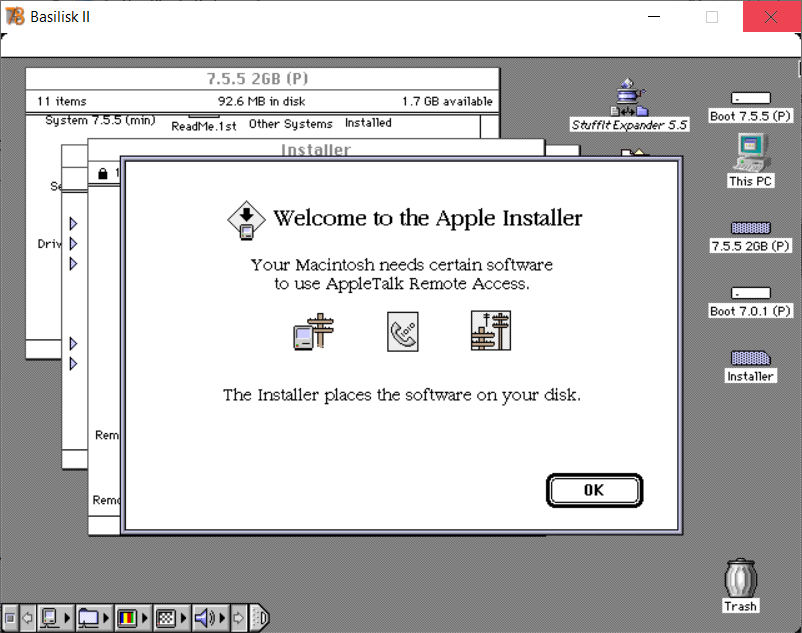
- Open the mounted Installer Disk (figure 5)
- Run the Installer Script (figure 5)
- Select ok on the Welcome to the Apple Installer (figure 6)
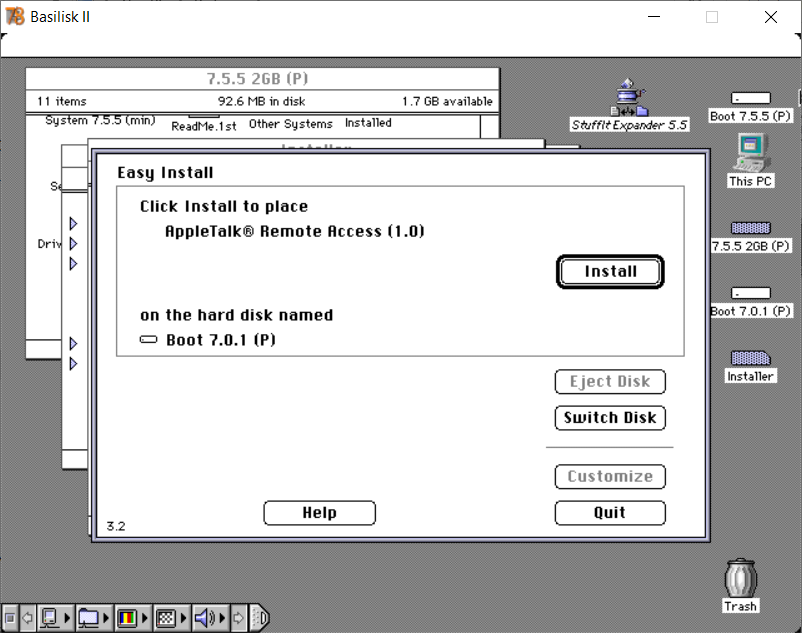
- On the Install Window (figure 7)
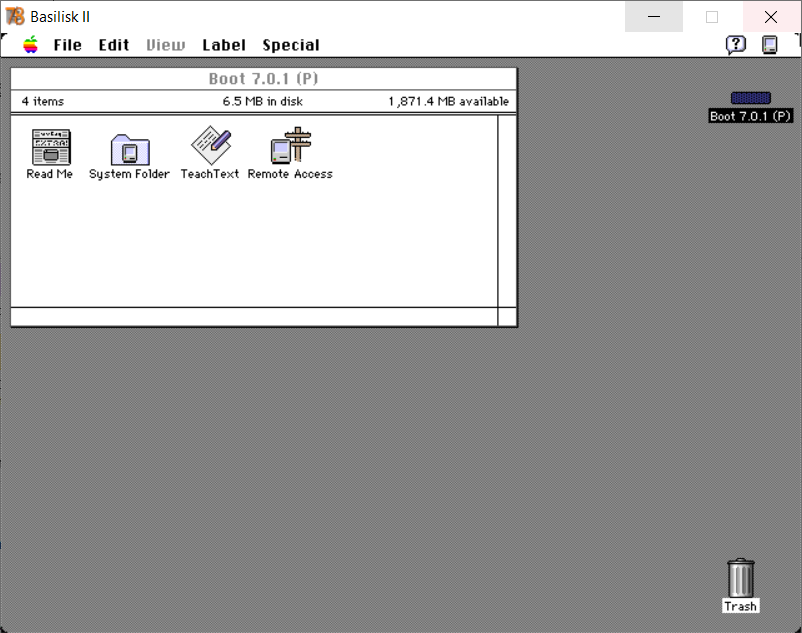
- You may need to press the Switch Disk button (figure 7) until your drive with the full version of 7.0.1 is selected, Boot 7.0.1 (P) for this guide
- press the install button
- when the install has finished press continue to install ARA 2.1 on another image or press quit if you’re done (figure 8)
- Close all the open windows
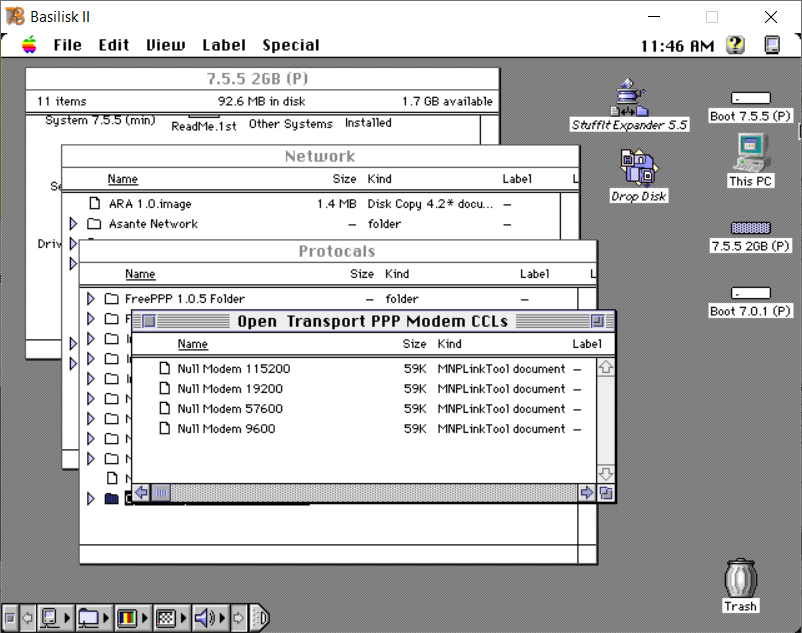
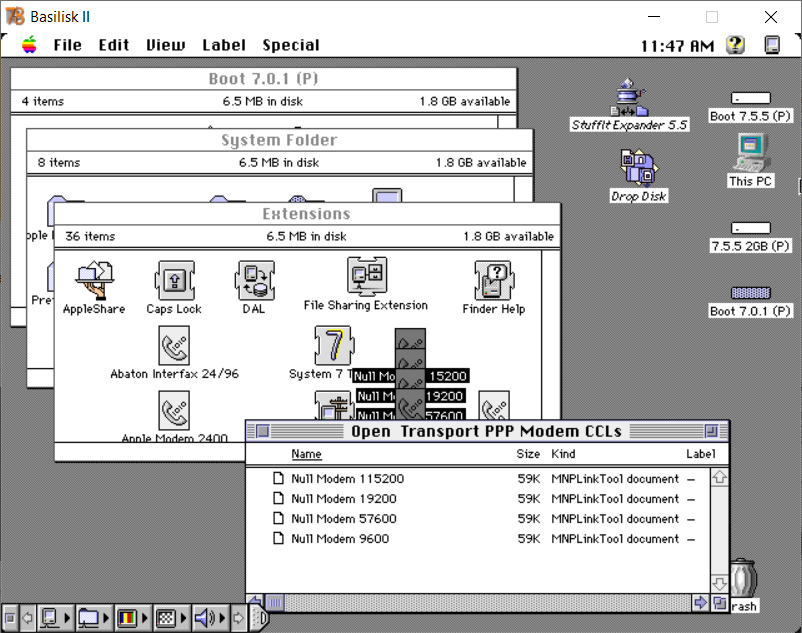
- Open the 7.5.5 2GB (P) drive, my bootable 7.5.5 image file (figure 9)
- Open the Network folder (figure 9)
- Open the Open Transport PPP Modem CCLs folder (figure 9)
- Open the drive(s) you installed ARA 1.0 on, Boot 7.0.1 (P) for this guide (figure 10)
- Open the System folder on that drive (figure 10)
- Open the Extensions folder on that drive (figure 10)
- Open the Modem Scripts folder on that drive (figure 10)
- Copy the Null modem CCLs from the Open Transport PPP Modem CCLs folder to the Modem Scripts folder (figure 10)
- Null Modem 9600
- Null Modem 19200
- Null Modem 57600
- Null Modem 115200
- Repeat for all drives you installed ARA 1.0 on to.
- Optional: Copy any other files/applications you want to on your ARA drive(s).
3. Enable AppleShare
Depending on which system you are enabling Apple Share on the steps can be a bit different, so I’ve created separate entries for each System
- Enabling AppleShare for System 7.0.1
- Enabling AppleShare for System 7.1.3
- Enabling AppleShare for System 7.5.5
4. Configuring AppleTalk Remote Access 1.0 (ARA 1.0)
When using ARA 1.0 and ARA 2.1 you have to setup one system to receive calls and one system has to be setup to make calls. If you have a LocalTalk network, you’ll want to use your most powerful system as the gateway to receive calls so that Basilisk II will be able to see all the systems on your LocalTalk network. If Basilisk II receives calls it can only see the Macintosh system that calls in, not the rest of your network.
4.1 Setting up Basilisk II / your Macintosh to “receive calls”
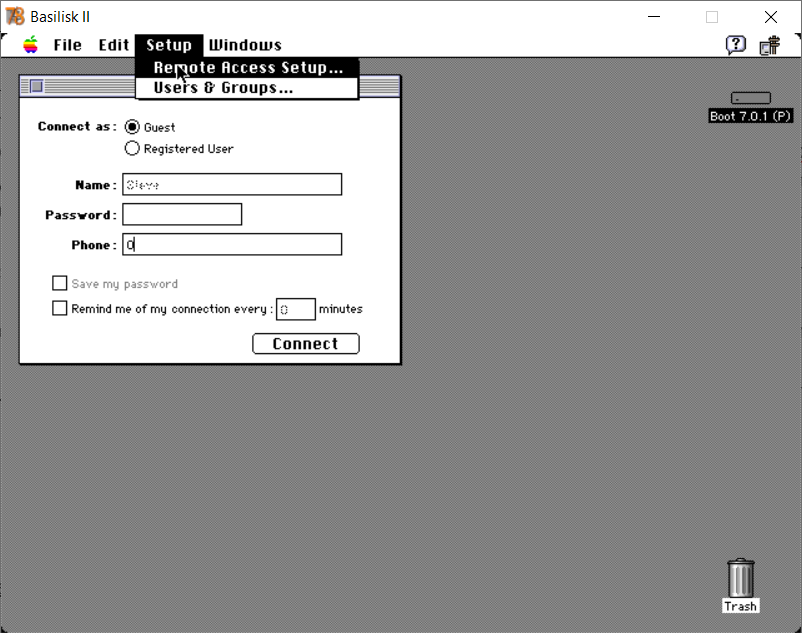
- Run the Remote Access Personal application (figure 11 above)
- Select Setup -> Remote Access Setup (figure 12)
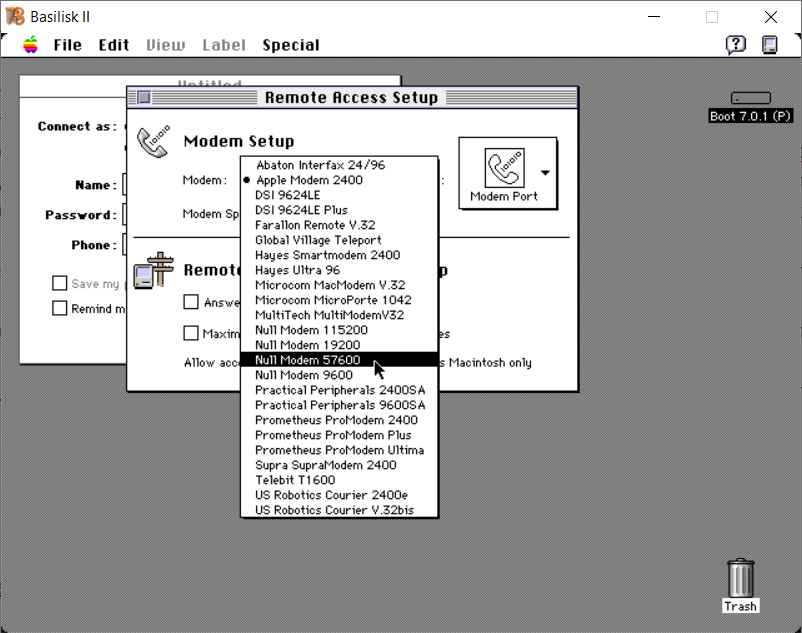
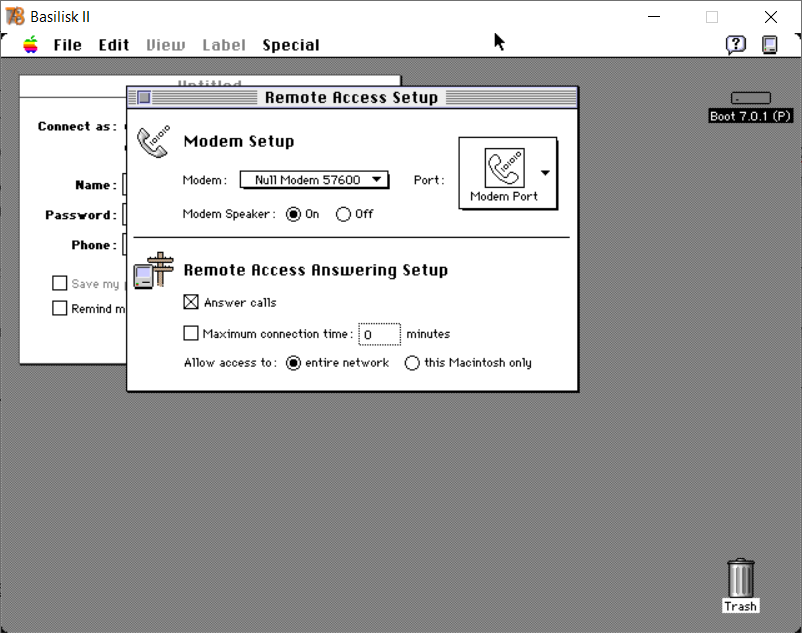
- On the Remote Access setup window (figure 13):
- Modem: Select one of the Null Modem drivers, I suggest starting with 9600 or 19200 to start with. (figure 13)
- Enable: Answer calls (figure 14)
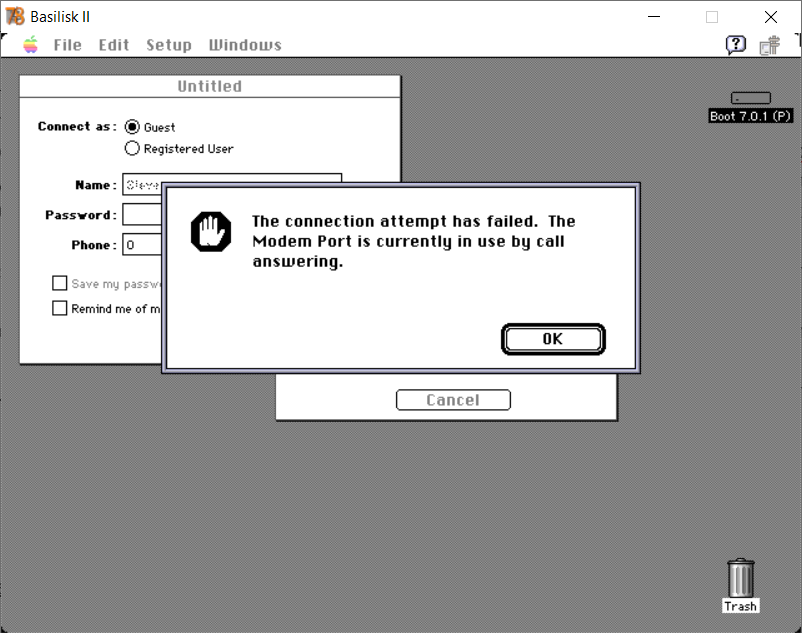
- If you get an error (figure 15), your null modem cable either isn’t connected, you don’t have the correct serial port selected, or your cable may not work (try Zterm)
- Enable: entire network
- Close the remote access setup window
- DO NOT EXIT ARA PS, leave it running in the background
4.2 Setting up Basilisk II / your Macintosh to “call in”
- Run the Remote Access Personal application (figure 11 above)
- Select Setup -> Remote Access Setup (figure 12)
- On the Remote Access setup window (figure 13):
- Modem: Select one of the Null Modem drivers, this needs to match the speed you picked for 4.1.3 above
- Disable: Answer calls
- Close the Remote Access windows
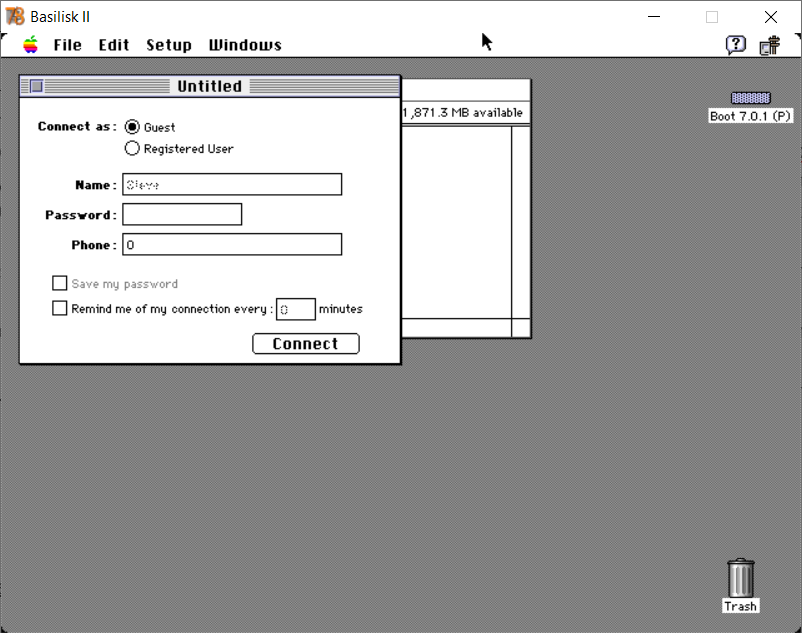
- On the Untitled window (figure 16):
- Select Guest if you did the same as me and allow Guest access, or entire the user name and password you want to connect with
- Enter 0 in the number field
- Press Connect
- You should see the window “Remote Access Status” indicating you have a successful connection
- Close the remote access status windows
- Close the Untitled window
- You will be prompted asking you if you want to save your configuration, you can if you want
- DO NOT EXIT ARA PS, leave it running in the background
5. Access a shared folder using AppleTalk
Depending on which system you are enabling Apple Share on the steps can be a bit different, so I’ve created separate entries for each System
- Sharing a folder with System 7.0.1
- Sharing a folder with System 7.1.3
- Sharing a folder with System 7.5.5
Hi gents – I just wanted to thank you for this site. The most amazingly clear instructions and wonderful set of resources. The removal of some disk image functionality from Big Sur had me worried, but thanks to you I’ve got a wonderful Basilisk II setup running, and a null modem cable on order to install stuff on my ludicrous collection. Much appreciated.